Inboard Propeller Installation Procedures
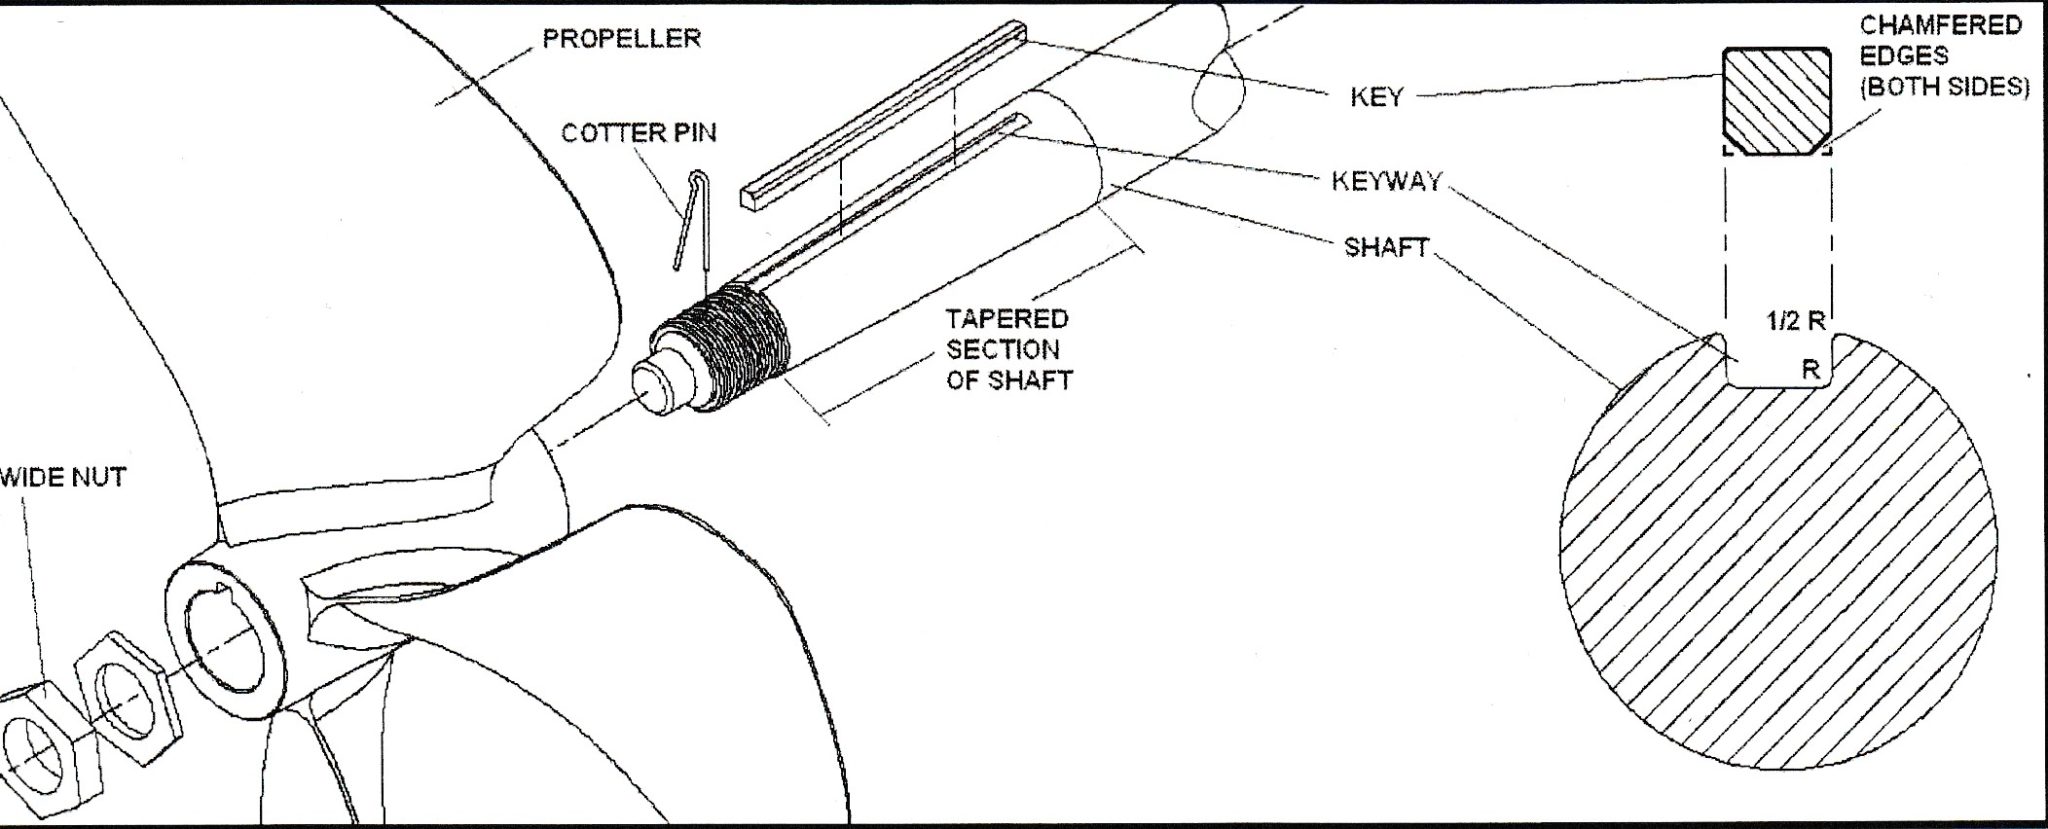
1. Put propeller snugly onto shaft taper WITHOUT key in either keyway (propeller or shaft).
2. Make sure the propeller is snug and there is no side to side movement by gently moving propeller back and forth.
3. Make a line on the shaft with a non-graphite marker at the forward end of the propeller where it butts up against the shaft taper.
4. Remove propeller.
5. Put key into keyway on shaft taper with radiused or chamfered corners (down) in shaft keyway (if propeller shaft keyway has radiused corners).
6. Put propeller onto shaft taper.
7. Measure the distance between the back of your propeller hub to the strut bearing. The distance should not be greater than your shaft diameter to avoid possible vibration.
8. Check to see that propeller moves back to the forward line made in Step 3. If it does, skip down to Step 9, if not, perform the following:
a) Remove propeller from shaft.
b) Place a file on a flat surface area or work bench.
c) Run opposite end of chamfered key back and forth over file (to remove any burrs) with downward pressure on key until side being filed is clean.
d) Install cleaned key in shaft keyway with chamfered corner side down in shaft (the cleaned, filed side up in keyway).
e) Replace the propeller on the shaft and fit snugly on taper. Check to see if it reaches the line made in Step 3. If it does not line up, then repeat these steps again.
(Note: a vise can be used to hold key and then filed, but care must be taken to not tighten too much, causing burrs and irregularities on key).
9. When propeller hub moves to correct position, install propeller nut on shaft and torque to seat the propeller. Install and torque jam nut also, if your shaft is so equipped.
10. Install cotter pin at end of shaft.
10 Brammer Drive
Orillia Ontario
L3V 7T4
OFFICE HOURS
Mon - Thurs 8:00am - 4:30pm
Friday 8:00am - 12:00 noon
Weekends closed